

This is a thrift flip I’ve been wanting to try for a while! I’ll show you a cheap way to make glass and ceramics look like stone or cement vases. It’s super easy, and you don’t need to stop with the paint – you can stamp on them too! Hope you enjoy! Resources below.PS – Wondering WHY this works? See this post where my Dad spills all his chemistry tea on the science behind the magic of the baking soda and paint cement effect.
If you are trying this at home and have any questions – TEXT me at 214.609.1648 and I’ll help you out.
RESOURCES (may have affiliate links)
+ DecoArt Chalky Finish Paint in Primitive
+Distress Oxide Ink Pad in Pumice Stone
+ Distress Oxide Ink Pad in Frayed Burlap
+ Stamp Chimp Bellflower Watercolor Stamp
I received the Stamp Chimp Bellflower Stamp Set complimentary for review. All opinions are my own.
Let’s Get Started
So, before we get going here’s my disclaimer. This is my very first time trying this baking soda and paint cement technique so keep this a zero judgment zone!
I cherish things with a history so giving old things a new lease of life is always my go-to craft if can. I guess you could say I am a born thrift flipper, so of course, this project which takes old ceramics or empty jars, (anything you have lying around) and makes them look like cement – or textured clay – is really pretty cool, especially when it’s so inexpensive to do.
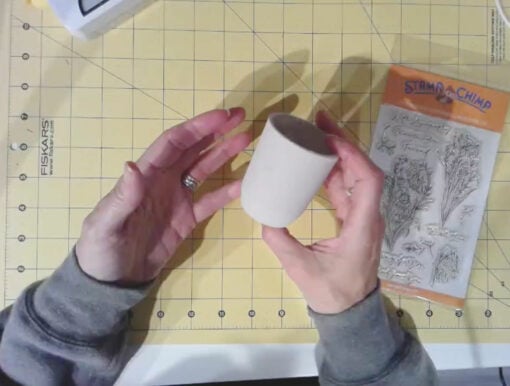
I have saved some little single-serving clear glass jars – these previously contained specialty puddings from the grocery store. Hopefully using chalk paint and baking soda, they are soon going to look like little cement craft jars.
Steps:
Mix up the paste:
I’ve used chalk paint in the color “Primitive” as I thought that would look most like cement but you can use any paint or multiple colors of paint. Start by pouring some paint into a bowl or on a pate and then add baking soda, keeping the ratio 1 to 1. Mix them together but don’t be surprised if it seems very thick, you may panic and think you added too much. Just keep stirring and the texture should end up looking like a cross between paste and paint.
Apply to jars:
Just like you’d apply any chalk paint to glass, just get after it! I don’t intend to use these jars with food when I’m done, but if you wanted to, you would need to put a finish them with a food-grade mod podge sealer.
You can see in the video, I also painted a larger brown jar. The darker color shows through the paste and I love that! If you don’t want that to show, you’ll want to give it an extra coat after the first coat dries.
Give second coat and stipple:
After letting them all set a little (warning, these dry pretty quickly), give them a second coat with the paste. If you’d like a little extra texture or need to hide your brush marks, before letting them dry completely, stipple over with a stiff brush. This will blend in the brush marks and leave you with a more authentic cement-look finish.

After giving the jars a couple of minutes to set but before they are completely dry, stipple over them with a stiff brush to blend in the brush marks and give a more authentically cement-like look.

Optionally add stamp and dress with ribbon
After letting them dry completely, I wanted to see if I could give them a little character. I mean, cement is cool and all, but I also like things to be a bit more feminine. I decided to try a stamped image on top of the cement using this pretty bellwether stamp kit I got from Stamp Chimp. I considered using a stamp block I picked up in Daiso but I thought the curve on the jar might give me some issues.
Before applying the stamp, I went over the surface of the pot with a sanding block (you can use sandpaper) – just to remove any rough spots and give the stamp a better surface to adhere to. Instead of using the clear stamping block, I just gently pushed the stamps down into Rangers Ink Archival stamp pad and then gently rolled them onto the jar.
The little jars that I started with are too small for the larger stamps in the wildflower (sadly) set but that’s fine. I think they look great and as an experiment the stamp on cement effect looks great and gives me a lot of other ideas for future projects.

In the video, you’ll see I started with black ink with the Stamp Chimp set and it looked good, but this was an experimental jar and I wasn’t finished playing with this new craft. I had a rummage around my craft supplies and found another Rangers Ink color, this time in Frayed Burlap. I really like the almost faded effect this has. It’s very subtle and adds to the artifact vibe of the cement jars.
For the first time trying to create anything with the baking soda and paint cement effect, I think it worked out very well and I have to say, the Stamp Chimp stamps worked beautifully. I was just playing around to see what mediums would work best on top of the faux cement but the stamps really added an extra flare and I’m looking forward to using them on other projects. I don’t do a whole lot of paper crafts but I do like multimedia projects and these are going to work great! (I received this stamp set complimentary in hopes I’d do a review with my honest opinion of them, so I can honestly tell and show you they work great.)
If you enjoyed this video, you can find many more on my Youtube channel. Check it out and PAH-LEESE subscribe there so you’ll see the new ones I upload. It means the world to me when you like and follow my channel! You can also join my text family and I’ll ping you when there’s something fun. If you make any cement pots of your own – I want to see them so text me!
 What’s your happy place? Crafting? Cooking? Cocktails? Party planning? Yes please! I love it all, and I’ve tried a lot. Check out my how-to’s! What should we do next?


0 Comments