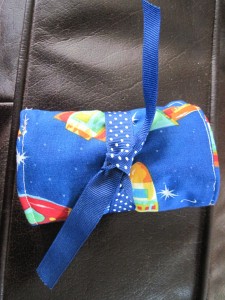
Crayon Rolls are the perfect thing to throw in your purse so you are prepared when you go to a big girl restaurant and they don’t have any crayons available, or they only give you four colors to work with, or you are trapped in a situation where there’s nothing to entertain your hyper little monster when you’d really like to have a conversation with another adult and be able to complete a full sentence in its entirety without losing your train of thought. Love them, and your munchkin will too – if even just to pack and unpack the crayons.
Here’s what you need:
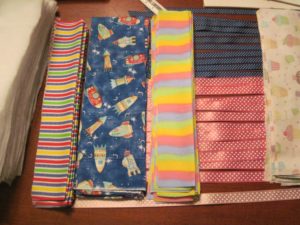
- (2) pieces ofcute fabric cut to 5 inches by 16 ½ inches – these are for the outside and inside of the roll
- (1) piece of coordinating fabric cut to 6 inches by 16 ½ inches – this is for the inside pocket
- (1) piece of batting cut to 5 inches by 16 ½ inches – this is for the lining. I like the extra padding, but you can also use flannel.
- (1) piece of ribbon 22 inches long (I used 18 inches but it was too short to make a bow, too long to just tie a knot – use your bestjudgment. You can always cut it shorter.)
- (1) box of 16 crayons
- invisible ink fabric marker or chalk.
- If you aremaking several of these, I highly recommend also getting a piece of cardboard or foam board big enough to cover both the 5” x 16 ½” inches and the 6” by 16 ½” to make a pattern pieces to measure your fabric. Then you can trace it onto the fabric with your marker or chalk.
- Chopstick or bamboo skewer or knitting needle.
Here’s how to make crayon rolls.
1) Cut out all your fabric pieces.
2) Iron all your fabric pieces – except if you are using batting. Don’t iron that, but do if you are using flannel.
3) Take the pocket piece (the 6” x 16 ½” piece) and fold it in half with the printed side out. Iron this.
4) Lay the flannel/batting out. Put one of the 5” x 16 ½” pieces on top, with the pretty pattern side facing you. Then put the ironed pocket piece on top of that, lining up the edges. Put the folded part of the pocket piece up towards the middle of the project. Pin this all together.
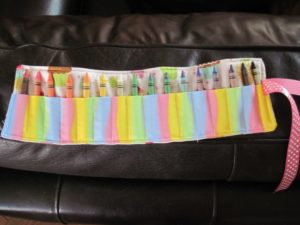
5) Measure 8 ¼ inches from the left or right side. You are going to find the middle and draw a straight line from the top to the bottom. This is the center and you are creating the first little crayon pocket by sewing on this line – after you make additional lines every inch from the center line, on both sides. Do this until you have all 15 lines drawn. Each side should have a little extra on the ends to allow for your seam allowance.
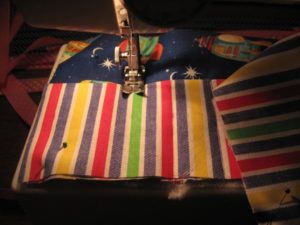
6) Start sewing! Start with the center line that you drew in the last step. Backstitch where you start and finish each line. Sew over all 15 lines that you drew.
7) Trim threads. I did this as I went – probably too time consuming, but I was having a lot of hairball issues and there was a lot of thread flying around. It was easier for me to have fewer opportunities for tangling.
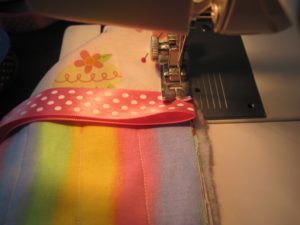
8) Now take your ribbon and fold it in half. If it’s printed ribbon, fold the printed sides TOGETHER so you are looking at the back side of the ribbon. (I didn’t do this and had to twist the ribbon to make the right side show when it is rolled up. No one else in the world will take the effort to do this so sew it the right way!) Sew it to the middle of the edge of the right side of your project. Remember to back stitch and go over the whole ribbon several times. It will have a lot of tugging so you want to make sure it’s secure.
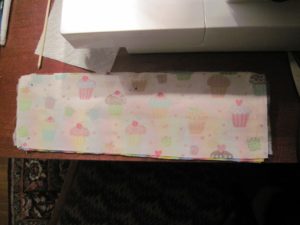
9) Take the remaining 5” x 16 ½” piece and put it on top of what you’ve just sewn, right sides together and pin it at each corner.
10) Sew the pieces together with a ¼” inseam/margin. Start on the left end (the one without the ribbon) leaving a 2-inch (or a little bit more) of an opening. You are going to have to turn this inside out so you need enough room to do this, especially if you are using batting.
11) After you sew around the edges, clip the corners so they don’t get all bunched up when you turn it inside out. Be careful not to cut your thread!
12) Turn the right side out and grab a bamboo skewer or chopstick to gently (I mean this. I poked through two when I got too aggressive!) push each of the corners out.
13) Remove your invisible lines if they are still showing. Most will remove with water, but check the instructions on your pen. (Mine did not.) If you iron it before removing them, they become permanent.
14) Iron the project flat. Tuck the edges in of the opening. I pinned them too.
15) Now, start on the end with the ribbon and start sewing around the perimeter of the roll, close to the edge. Sew up the opening.
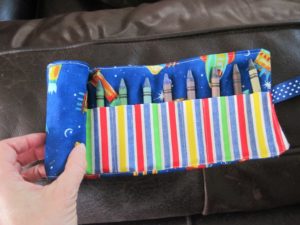
16) Tah-Dah! Grab your crayons – I organized them by rainbow color. Your child will likely never do this.
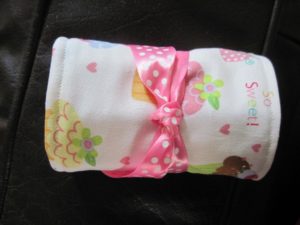
17) Roll it up and tie the ribbon around it.
18) Admire your handiwork! Soooo cute!
You can modify this project to be a brush roll just by making the fabric longer than 5″ and 6″ high. Any other ideas on how to modify this for other uses?

 What’s your happy place? Crafting? Cooking? Cocktails? Party planning? Yes please! I love it all, and I’ve tried a lot. Check out my how-to’s! What should we do next?


0 Comments