I can’t stand a naked door! Porch appeal is something I am passionate about, and the basics begin with a door wreath. Door wreaths are welcoming but they can cost a small fortune. Have no fear, my boujie on a budget idea will speak to your wallet. After you see how easy it is to do your own DIY wreath glam-up, you will never have to pay crazy bank for one ever again! Choose a base wreath that already has some relevance to your home decor, and you are already halfway there.
Walmart Hello Front Door Wreath ($20)
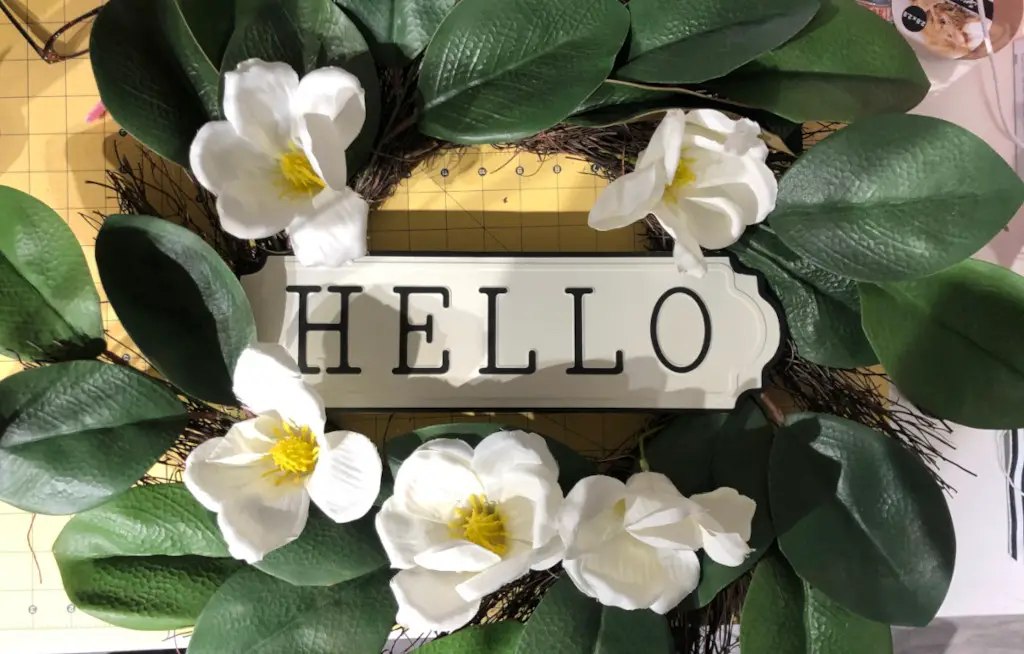
Believe it or not, this first wreath I found at Walmart for $20! Living in the South and spending a lot of time in Louisiana, there was no way I wasn’t coming home with this magnolia wreath. Plus the metal sign in the middle is just so cute, or at least I thought so. My shopping buddy (read 13 year old daughter) gave it an underwhelmed shrug and said it was “…okay,” although she quickly followed up with the comment, “I trust your vision.”
This wreath, with its friendly Hello sign, is destined for our front door– the same door that I can’t hang anything on because of the textures. I was determined to make it work, and keep my husband happy by not putting a nail in it.
Aldi Hello Sunshine Wreath ($16)
The second wreath cost only $16 at Aldi. I think it is absolutely adorable and the buffalo plaid will play very well with the McKenzie Childs accents throughout my kitchen. My plan was to hang this on an interior door (the one to the garage). The jaunty lemons scream summer, so I’m hoping this one will stay put for several months. Both the “Hello Sunshine” sign and lemons are wooden so I’d recommend that if you wanted to hang this one outdoors, that you give the wood bits a coat of polyurethane or Mod Podge for protection. The leaves of the wreath are plastic, so they will stand up well.
Okay, so let’s zhuzh these two up a bit and make them a little more bougie!
Hello DIY WALMART Wreath Glow-Up
The sign in the center is wired in so that is already secure so no need to reinforce the focal point of the wreath – it’s not going anywhere!
Our front porch has a little antique white bench, so my plan was to fluff out the white areas of the wreath. Naturally, you could use any color that speaks to you, I’m just keeping it to white for this project.
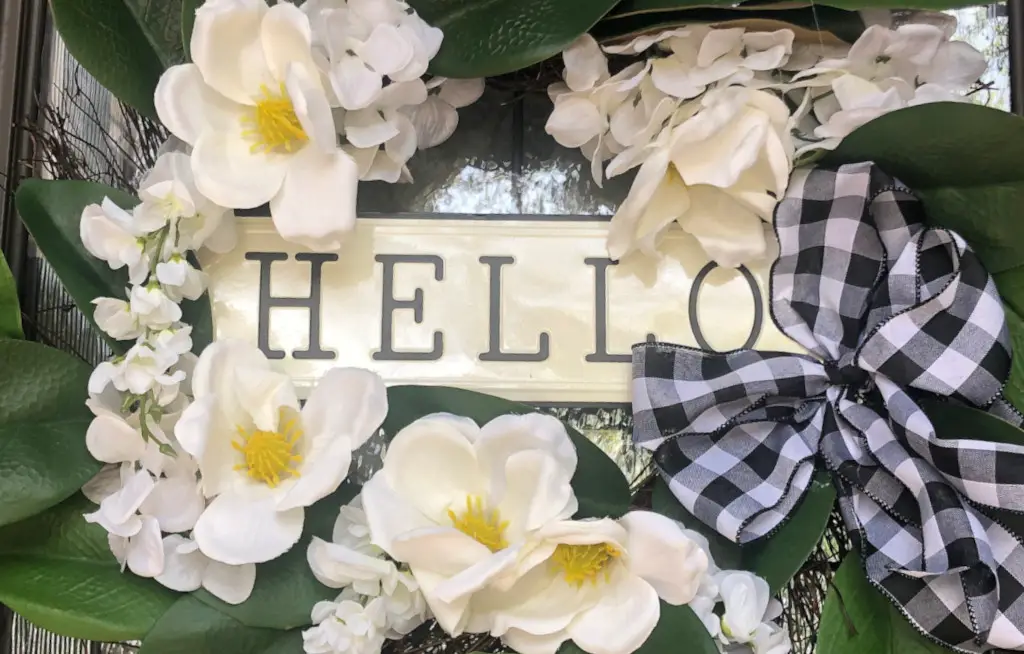
I am one of those people who buy craft supplies without a reason other than I just like them, so I happened to already have a stem of wisteria from Walmart. I snipped some pieces of the wisteria off and placed them strategically around different areas of the wreath to see what I liked. Once I found the perfect spots (basically on either side of the magnolias), I was ready to glue them down. Don’t forget to leave a space for a bow! I prefer hot glue for this but you could also use e6000, you’ll just have to give it a few hours to set and use it outdoors because of the smell. To give a little more depth, and texture, I also added white hydrangeas. The hydrangeas were leftover from a flower garland I bought at Michaels a long time ago. I just keep snipping pieces off to use in various projects. I highly recommend checking out the floral garlands at Michaels when they go on sale for this very reason! Stock up!
When you are happy with the flower arrangement around the wreath then you can add your bow. I used three layers of smaller-sized, black and white checkered ribbon. You may prefer a larger, more colorful bow depending on what will work best with the flowers you picked.
Put the bow in place with hot glue. Check the placement to be sure that the bow doesn’t cover the ‘o’ of Hello or you may end up with a less welcoming sign than you intended.
Tip: Stop bow edges from fraying by singing with a lighter.
Hello Sunshine Aldi DIY Wreath Makeover
The first thing to do with this little beauty is to fluff up the bow from its travels, and examine where it has the best potential to add more foliage and flowers to fill it out a bit. This one is a bit sparse in terms of leaves so I wanted to add more than just flowers to it. Like in the Walmart wreath, I am using flowers and leaves I already had in my craft supplies (remember I said never to throw out the leaves!). I did the very same process with this wreath, just adding in a few extra bits of floral and a checkered bow. Took very little time and very inexpensive to do so.
As you can see in the video, this #aldifind wreath will take the place of the easter bunny on the inside of the garage door. I like to have something in this spot because it is what my eyes rest on when I am at the kitchen sink — and it feels like I’m forever at the kitchen sink so this was a very important project! You can literally tell what season or holiday it is by what I have hanging in this spot.
I didn’t go into the details of how I hung the first wreath on the door but it’s in the video. Spoiler alert: it involves command strips strategically places, and fishing wire.
I hope I’ve inspired you to go halfway homemade with your wreaths. It’s a boujie on a budget project I love! I’d love to see how you level up your bargain wreaths! If you give it a go, please post photos and tag me with #triedbytrista so I see them! OR if you’re shy, you can text them to me at 214.609.1648!

 What’s your happy place? Crafting? Cooking? Cocktails? Party planning? Yes please! I love it all, and I’ve tried a lot. Check out my how-to’s! What should we do next?



0 Comments