This peppermint candy ornament has been endorsed by the Princess Cupcake.
They are shamelessly easy –
Here’s what you need:
A bag of peppermints – unwrapped
Cooking spray
Parchment paper
Cookie sheet
Paper towel
Ribbon
Here’s what you do:
Preheat oven to 300 degrees.
Tear some parchment paper off and cover your cookie sheet.
Spray your cooking spray over the parchment paper.
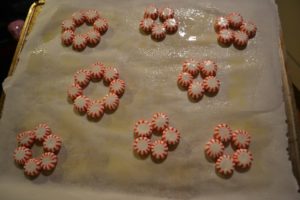
Arrange 6 of your peppermints in a circle with sides touching.
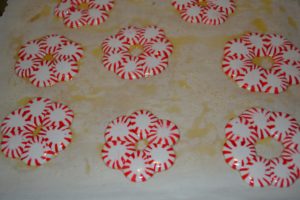
Put the peppermint flowers in the oven for 6 – 9 minutes, depending on the thickness of your cookie sheet and oven variance. You can also use Life Savers for these, but shorten your baking time by a minute or two.
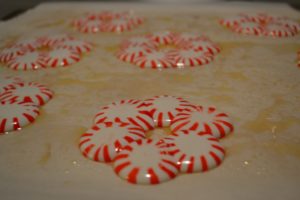
Check them at 6 minutes, and then every 30 seconds to one minute until you see the candies start to look soft. They will spread a bit more after you take them out.
As soon as they start to look soft, remove from the oven and let them cool on your cookie sheet.
After the peppermints have hardened, place them on a paper towel to absorb the cookie spray.
Optional: If you want to preserve your ornament, spray with clear gloss to keep the moisture out. But note that you and your pets cannot eat them afterwards.
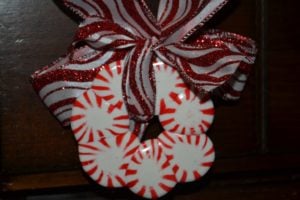
Make a cute bow to hang them on the tree or dress up other areas of your home.
What we learned:
We found that six was the magic number of peppermints. Five, and the ribbon hole seemed to be too small. Six was perfect.
Do not put these outside to cool – or to spray your polyurethane onto. I did this, and had to put a whole batch of ornaments into the circular file because, guess what, they all cracked. I am guessing the peppermints shrunk in the cold air.
Let the gloss dry completely – really completely totally dry before you turn them over to spray the other side. Trust me, I thought a batch was dry and flipped them onto a paper towel. Well, the towel stuck to it and now they are fuzzy. Normally, you’d just grab some water to lift off the paper towel remnants, but you can’t in this case because the candies start to melt.
The thicker the ornament (the less time you bake it), the more sturdy the ornament.
Make more than you need. You’ll lose some due to cracking.
As soon as the hubs saw it, he asked, “Can we eat them?”
As soon as the Cupcake saw the finished ornament, she asked, “Can we put glitter on it?”
Stay tuned.



 What’s your happy place? Crafting? Cooking? Cocktails? Party planning? Yes please! I love it all, and I’ve tried a lot. Check out my how-to’s! What should we do next?


Could you put a Pinterest tag on this? Or tell me how I can pin it? Please!!!!
So sorry! I didn’t realize my social buttons were gone! Thanks for pointing that out. 🙂
Is that “Emma” from General Hospital in the picture above?
What kind of clear gloss do you use to spray the ornaments with?
I just use a clear polyurethane from the home improvement store. Be sure to spray it outside where it’s well ventilated and let dry completely. 🙂