

I love featuring all the amazing talented women in my craft exchange. Our 8th exchange theme was AMERICANA and these ladies really came up with some fab projects. Today I’m showing you the nautical bracelets that Jenn made, similar to what you’d find at major retailers for a LOT of money — for rope anyway!


Here’s what Jenn had to say about her project, tips, and her inspiration:
What was your inspiration for choosing this project? I had seen them in the Mark & Graham catalog and these cute bracelets were selling for $60 a piece and I decided “I can make those.”
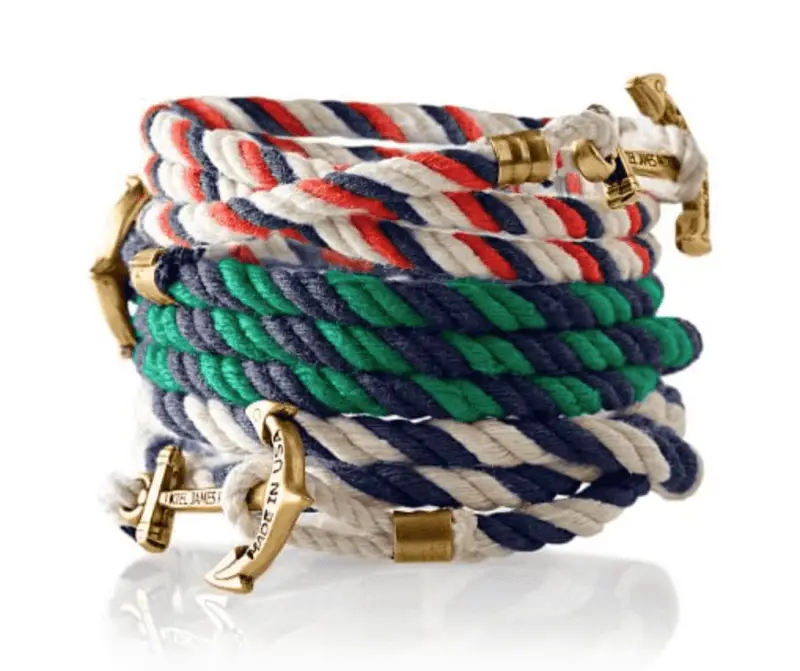
Image: MarkandGraham.com
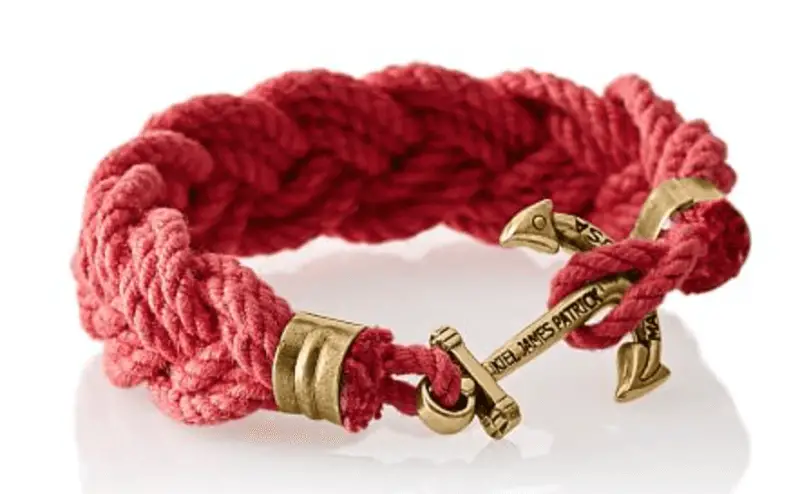
Image: MarkandGraham.com
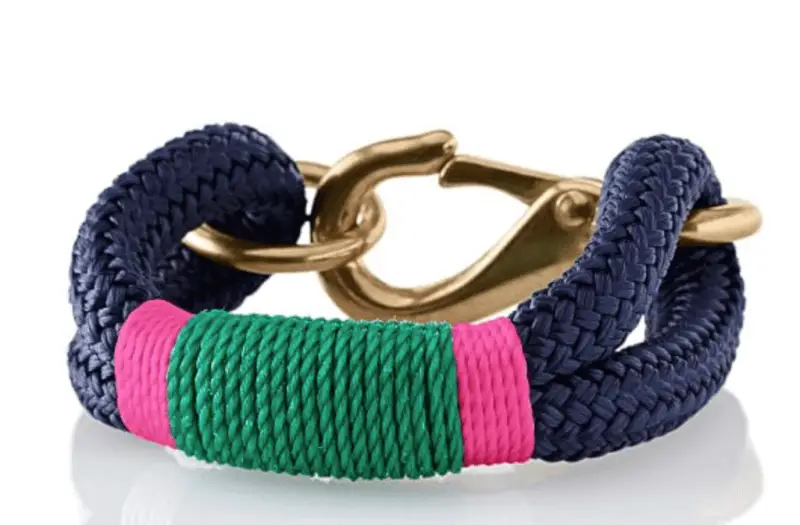
Image: MarkandGraham.com
What materials did you use? Hooks, anchors, rope (of all kinds), jump rings, waxed thread, hot glue, scotch tape, needle nose pliers, scissors, and a can of vegetables (I’m not kidding).
Where did you get your materials? I ordered some of them from Etsy like the clasps, etc. but the rest came from Michaels.
Cost of materials: This is an estimate but probably around $5 per bracelet so $15 for each person.
How did you make it, step by step? Well I made several different types of bracelets.
I did a Turk’s head knot bracelet for some, which you can find steps for online, it’s just a lot of knotting and this is where the can of vegetables came in.
For some of them I just cut them to size, taped the ends, created loops to enclose them, and closures with my needle nose pliers.
For the ones with colored waxed thread, I cut them, folded them into themselves to make loops on both ends, taped them together, hot glued some twine, wrapped it tightly to cover the tape, then added a second color over the top of the first color. Added clasps and voila.
Some I just wrapped and put closures on so you can wrap and wear the rope twice.
How long did it take per item? Once I got the hang of each, ½ hour per bracelet, however, to test them out and learn how to do the knots and make them look like the ones in the catalog I would say hours.
What was the hardest part about making this? Learning the technique, then it was easy. I’ve said this before, I’m not a jewelry maker (although you probably don’t believe me at this point since that’s all I’ve made for craft exchange), but I really am learning these techniques as I go.
What was the funnest part about making this? The end result, I made some for myself and I LOVE them. I also love mixing and matching them.
Do you like it? Yes, see above.
If you made it again, what would you change? I don’t think I’d change anything.
Would you make it again and why? Yes, in fact I’m thinking of making more and selling them on Etsy.
Thank you Jenn Andrlik-McMurrer for your amazing bracelets!
 What’s your happy place? Crafting? Cooking? Cocktails? Party planning? Yes please! I love it all, and I’ve tried a lot. Check out my how-to’s! What should we do next?


Very beautiful bracelets
I wish I could take credit, but I TOTALLY agree. 🙂