

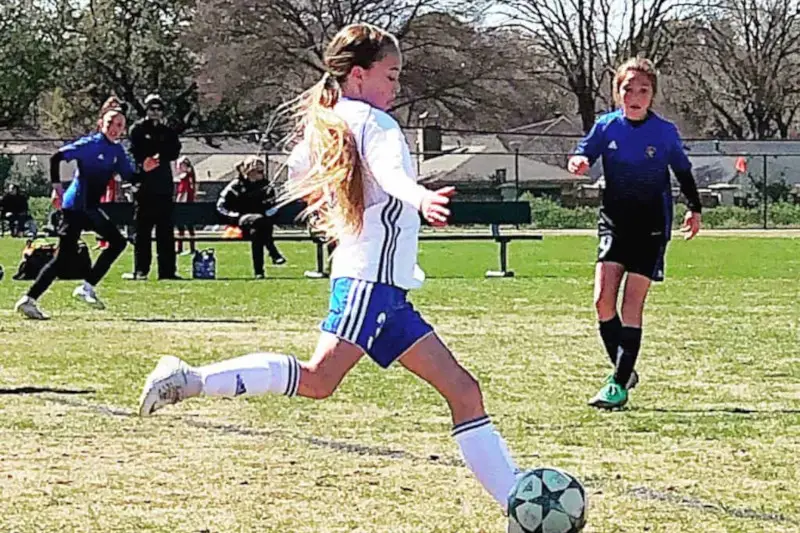
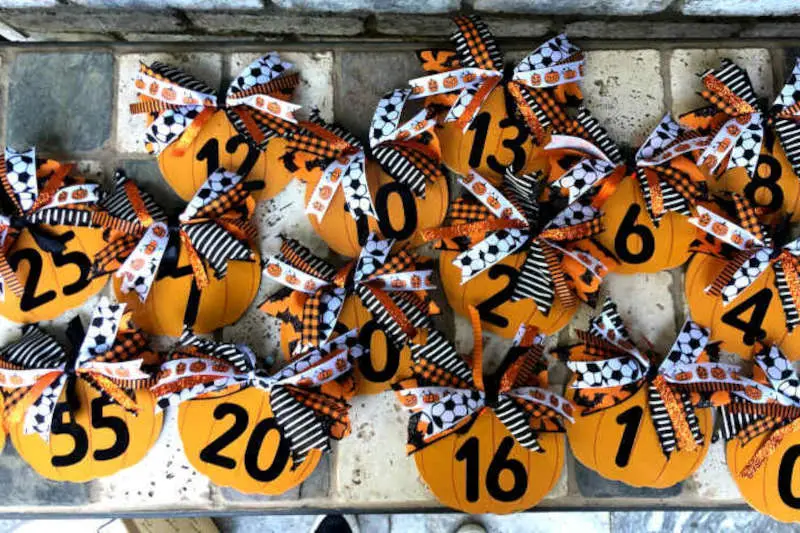
If you’ve followed me on social, my blog or Youtube Channel, it’s not news to you that I love being a soccer mom. Most of my spare time is spent at the field (or driving to and from the fields or soccer training…). My daughter plays for a club team so their league games are often out of town. I make these spirit door hangers for road trips, and I make them a little bit different for every soccer tournament or away game. (Click here to see the pumpkin-themed soccer locker decorations I made last fall.) Even our teen girls (notorious for not liking anything) like to decorate their hotel room doors with these — and as a parent, I like them because when they are hung on the doors, the girls are not running up and down the hallway trying to figure out who’s in which room.
These soccer door hangers are not rocket science! They’re easy to make and I’m here to help all my fellow soccer moms and dads who would like to make them for your own soccer team. They’re really simple to put together, and I’ve figured out how to batch it to make the process to make it go pretty quick. If can whip them out two within a few hours before the tournament, I’m sure that you can too!
This is what I used to make the door hangers shown in the video.
Supplies (some affiliate links):
- six-inch diameter wooden discs (these are what I used: https://amzn.to/3Qh93uy)
- team color coordinated paint spray (I used Rustoleum in yellow neon – https://thd.co/3d8hcm8)
- ribbon in assorted widths and lengths – also consistent with team colors
- foam soccer ball shapes (I can’t find what I used online, but these are similar: https://amzn.to/3SCpIKs)
- number stickers (these are what I used: https://bit.ly/3JIaYFO)
- pipe cleaners (any are good, but here’s an example: https://bit.ly/3p5D4kL)
- command strips, poster (this is a value pack and will save you money! https://amzn.to/3JJPvwj)
- optional: team name lettering (I used my Silhouette for this: https://amzn.to/3SwBMge).
First step, spray-paint each of the discs with our team color. I didn’t wait for them to dry for a second coat but gave them two really good coats at the same time. They absorbed the color well – and remember, most of it will be covered anyway.

These are the ribbons that I considered using for the project, but after laying it all out to get an idea of which would work best, I chose only four styles of ribbon in different widths.

This is the simple part – making the bows. You really can’t mess this up and I love that you don’t have to actually tie anything pretty because I feel like bows are so hard to do.
NOTE before you start: Always, always, make one or two samples before you start cutting all your ribbon! I always measure out my ribbon and make one hanger completely to be sure I have the measurements and lengths correct, then I go back and cut all my pieces.
For the six-inch wooden discs, I cut the blue background ribbon to six inches long. Because I was using it as my background, I cut two pieces of this per door hanger. For example, if you’ve got 12 girls on your team, then you want to cut 24 of these six-inch pieces. Next I cut my yellow ribbon. For this one, I only used one piece of this ribbon, but if I were going do this project again, I’d probably do two of the yellow as well. Important to notice: the yellow is a different width than the blue. That’s really a key to all of this, making sure you have different widths of ribbon.

The next important step is to layer the ribbons so that you can see each ribbon. In this project, the soccer ribbon is the widest ribbon and also the highlight so I put it straight across, and the middle of the ribbon sandwich. You could do two of these as well, but as this particular ribbon is a bit pricey, I used it sparingly but it’s still effective.
Once you’ve got all your ribbon cut, finish the ends with points. It’s super simple to do. Gently fold your ribbon in half lenghwise and then cut the folded part off at an angle. (If that doesn’t make sense, check out the video 😉 ) It gives you nice finished look to the ribbon and helps to keep the ribbon from fraying.
After you have your ribbons laid out how you want them, pinch the middle point of the ribbons together with one hand. With the other hand, take a 3-inch piece of pipe cleaner and secure the pinch in place by wrapping it around and twisting the extra bit on the back. If you don’t like the way it looks, just let go and pinch it again! Super easy.
Now you have a fun little ribbon bundle. I like to cover the pipe cleaner with a skinnier ribbon. I used a 5-inch piece and left the tail on it. Wrap it from the back forward, so the tail shows on the front of your ribbon bundle. Be sure to cover up the pipe cleaner. It stays put, looks cute, and cinches the bundle in the middle just a tad bit more.
If you like the look of your ribbon bundles and they’re the right size, get to cutting all your pieces of ribbon and pipe cleaners. Arrange them in piles in the order that you’ll use them and it will make this part of the process go by very quickly.

The next step is to put the player numbers onto the soccer balls. I love this pack of number stickers from Michael’s. The number are the perfect height for these projects and I can usually use one package of these stickers for all of our team numbers.
It’s a smart idea to write down all the player the numbers they’re ready to go. If you’re putting the team name on these too, remember to leave room for it at the top of your soccer ball. After your soccer balls are decorated, all you have left is to glue everything down. That part goes super fast! Put the ball on the wood disc first, then above it add the ribbon bundle.
I give each player a poster command strip to mount their door hanger on their hotel door. That way it doesn’t hurt the door and they can easily remove it when they’re leaving!

 What’s your happy place? Crafting? Cooking? Cocktails? Party planning? Yes please! I love it all, and I’ve tried a lot. Check out my how-to’s! What should we do next?


0 Comments