“Hey, what are we making this year for our Christmas presents?”
Each year, me and my bestie in Ohio, virtually make similar gifts to give to all our friends and family.
“Mosaic tile ornaments,” because Molly’s always up on the trends.
“Um, say what?” Me, not on Tik Tok…
“Those lantern tiles. I’m headed to the store right now to get supplies.”
*texts me a photo*
Now I felt stupid. I have these arabesque tile accents on every wall in my whole bathroom and I never thought to make Christmas ornaments out of them – and yet, now, I can’t see anything else.
And that’s how it started. I was at Home Depot that afternoon, in search of arabesque tiles.
Mine are 3-inches wide, but you can get bigger ones, and smaller ones.
Molly and I spent the next week trying out different techniques to custom make our ornaments. She has a huge list of people to give them to, but I did them mostly because I was curious, and also because I thought I might find a few people who might want one.
All in all, I tried 5 techniques:
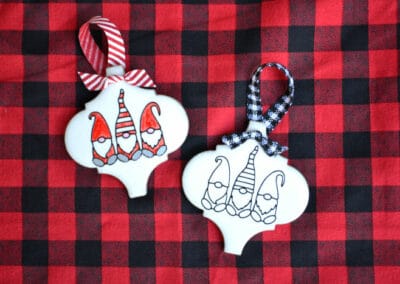
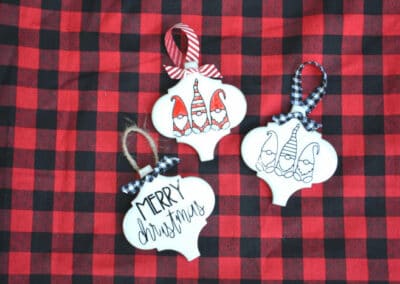
- Tiles with custom-cut vinyl from my Silhouette
- Tiles that were spray-painted AND with vinyl/chipboard letters
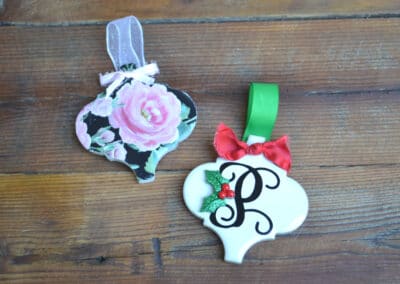
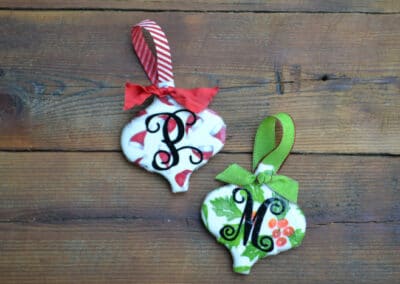
- Tiles that were decoupaged
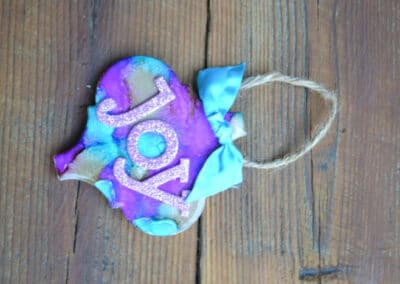
- Tiles colored with alcohol inks
- Tiles decorated with Diamond Dotz – patting myself on the back for getting really brave with this one.
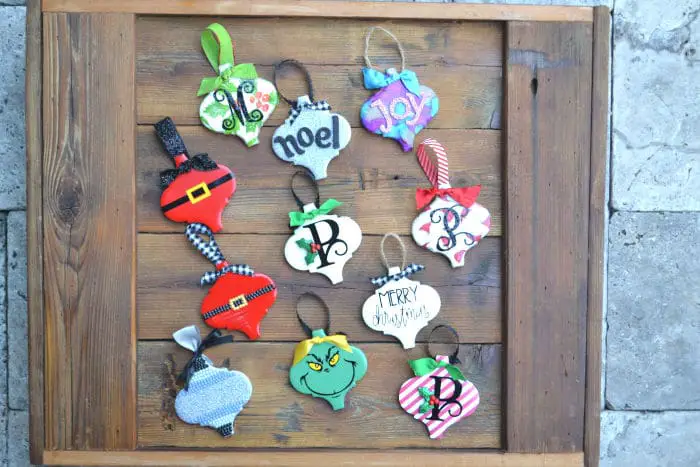
Which was my favorite? I can’t really say for sure, but I am totally addicted to making them. Here’s my collection so far:
Want to learn how to make lantern tile ornaments? They’re all pretty easy and inexpensive to make. Let’s go through the 5 ways to create the lantern tile ornaments.
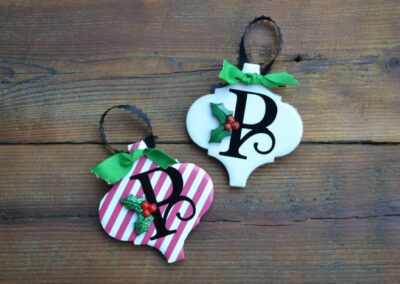
lantern tile Christmas ornaments with stickers and vinyl

- Lantern Tiles
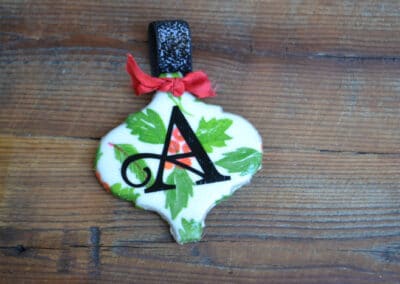
- Stickers – holiday designs, monogram or glitter letters. I especially like the three-dimensional stickers like the holly that I used on mine.
- Ribbon – mostly ½ inch – 1 inch wide
- Strong glue like E6000 or Gorilla Glue
You can use the tile just as it is, and simply put your stickers on it. Super easy, and you can get the kids involved!
But it won’t hang on the tree unless you attach a ribbon with a strong glue like E6000 (my preferred). NOTE: Adults only with the glue and be sure to use in a well-ventilated area!
My ribbons on my loops are about 5 inches. They glued to the back of the tile at the top. Let the glue sit overnight in your garage or outside to cure.
The bows on mine are just scraps of single-knotted small ribbon and attached with E6000.
Optional: You could order some “D” rings from Amazon to make a nicer finish on the back.
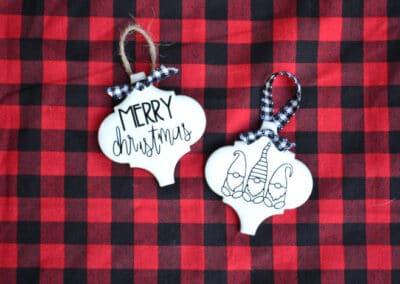
Take this technique up a notch and cut your letters or designs with a custom vinyl cutter. You can download holiday designs or create custom designs from your Silhouette or Cricut very quickly. If you don’t have a cutter, you can also order the vinyl pre-cut from many different Etsy vendors. For the tile ornaments, I use Oracal 651 outdoor vinyl to make sure it has a good adhesion.
Don’t stop there! Take this even one step further by using permanent markers like Sharpies to add color to your tile. The color will stay on the tile once it’s dry. If you’re good at hand-lettering or painting, you could free-hand some beautiful designs on the tiles.
I covered mine with a coat of Mod Podge (more on this below) just to give it some extra protection against scratches.
DIY Painted Tile Ornaments

You’ll need:
- Tiles
- Stickers – holiday designs, monogram or glitter letters.
- Ribbon – mostly ½ inch – 1 inch
- Strong glue
- Spray paint
My advice is to purchase your spray paint at a home improvement store as their prices are more reasonable for spray paint than craft stores, they have a larger selection, and you don’t have to wait for someone to unlock the case.
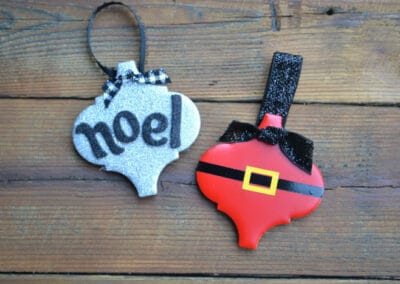
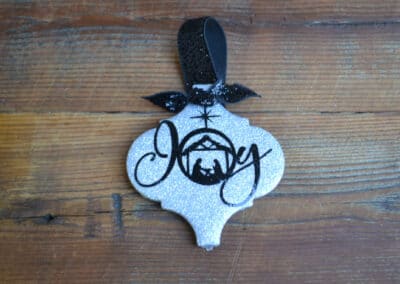
For the tile ornaments you see in these photos, I used Rustoleum 2X Ultra Cover in Apple Red for the Santa tiles, and Rustoleum Glitter in Silver for the silver ornaments with the Joy and Noel stickers. The green tile with the Grinch face is painted with Krylon brand spray paint in Shamrock Green.
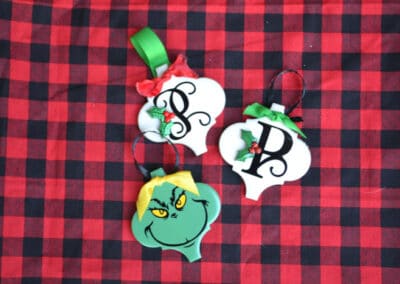
As you can see that the Santa belt and the Grinch were cut with my Silhouette (you could hand cut the Santa belt if you wanted to), but you don’t have to use vinyl on these – the Noel ornament features glitter chipboard letters that I glued on with the E6000.
To finish these off, you’ll also want to add ribbon for the tree loop. I make my loops with a piece of ribbon about 5 inches long. Use Gorilla glue or E6000 to attach it all together (see my safety notes above about the glue.) Be sure to glue the ribbon to the ornament and the other loop of the ribbon. I think Molly staples her ribbon together first to hold it exactly where she wants it.
How to decoupage lantern tiles

Have I told you about my craft crush on Mod Podge? This is one of my most used craft supplies. It comes in a crazy number of different formulas, but for this project, we use the traditional gloss.
You’ll need:
- Mod Podge
- Pretty holiday napkin or tissue paper.
- Foam brush
- Monogram stickers (see above for ideas) or custom vinyl cuts (see above notes)
- Ribbon – about 5 inches plus a scrap if you’re adding a knot on the front of the ornament
- E6000 glue (see safety note in the first technique)
If you’ve never done decoupage before, don’t let it intimidate you. It’s very simple, it’s just painting on glue, really.
Step one is to use a foam brush to coat a light layer of Mod Podge onto your ornament. This will serve as a glue layer for you.
Cut a piece of tissue paper or holiday napkin larger than the ornament. If using a napkin, peel apart the double layer. You only want to use the layer with the design printed on it.
Gently place the napkin piece on top of the ornament, being careful to cover all the edges.
Gently coat with another layer of Mod Podge.
Let dry overnight.
Cut or gently tear the excess tissue from the ornament and smooth the edges.
Add your embellishments to the front of your ornament.
Glue your ribbon to the back of the ornament at the top of the lantern.
Let dry in a well-ventilated area for several hours.
How to make lantern tile ornaments with alcohol inks

You’ll need:
- Tiles
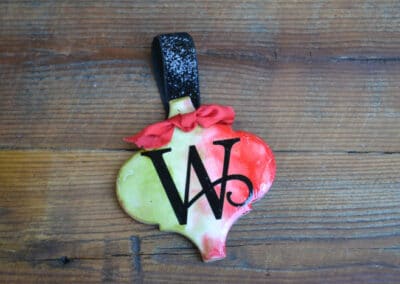
- Alcohol inks
- Application tool
- Ribbon
- Strong Glue
This next technique to make lantern tile ornaments is so quick and easy, the whole family can get in on it! Create a collage design or tie-dye look by using alcohol ink.
If you’re new to alcohol inks, you’ll need to stock up a few supplies first. These will last you a long time and you can make all beautiful things with them so don’t think twice about buying them (says your enabler).
You’ll need:
- Alcohol inks
- Applicator tool
- Tiles
- Ribbon
- Glue
You’ll likely want to use a plain white tile for these so that colors are vibrant. Simply attach the felt applicator to the Velcro part of the tool, and then squeeze a drop or two of the alcohol inks onto the felt wherever you like. Add additional colors as you like, covering as much of the felt as you want. Then dab the felt onto the tile. That’s it!
Cover the tile with the colors, get creative! (Caution: this is an addicting craft.)
Let the tile dry overnight.
Once dry, I recommend covering these with a coat of Mod Podge so that the color doesn’t chip or rub off when you store your ornaments.
You can also add embellishments like stickers, chipboard, or three-dimensional decals to them.
Finish these like the others, with a 5-inch piece of coordinating ribbon, glued to the backside of the top of the lantern tile and allow to set overnight.
How to make lantern tile ornaments using diamond painting
Diamond painting has been my Covid-hobby. Basically, diamond painting is what would happen if needlepoint and paint-by-number had a baby. With diamond painting, you place individual, teeny-weeny faceted “diamonds” in patterns onto canvas that has a super strong adhesive to it. When you’re done, it creates a beautiful, sparkly design. See my video HERE to get a better idea of how to do it.
To diamond paint on tile ornaments, you’ll need:
- Tiles
- Ribbon
- Strong glue
- Paint (optional)
- Diamond Dotz or similar (they don’t have to be this brand)
- Diamond Dotz glue or similar
- Mod Podge
I tried this technique on two types of tiles: painted and glittered. Either works, but the glitter tile ornament has additional steps.
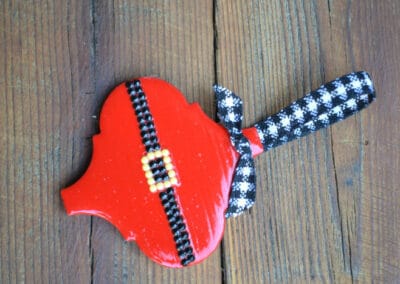
For the Santa belt, I chose one of my tiles was painted red and affixed painters’ tape across the widest part of the lantern. I did that on both sides to tape off the area that I was going to put the black diamonds to make the Santa belt. Then in that area, I used the Diamond Dotz glue (here is similar) to paint a strip where the belt goes. When you use this glue, it goes on opaque, but once it dries to clear, it’s sticky and you can apply the diamonds. Don’t let it sit too long or the sticky won’t last.
Once my glue turned clear, I made a couple of rows across the tile with the black diamonds. I left the painter’s tape on the tile to help me with my lines. Turns out though, when I removed the painter’s tape, the glue had seeped under it. This was okay because after I put my diamonds on the tile, I covered the whole tile with Mod Podge to seal it. You couldn’t see where the excess glue had run under the tape.
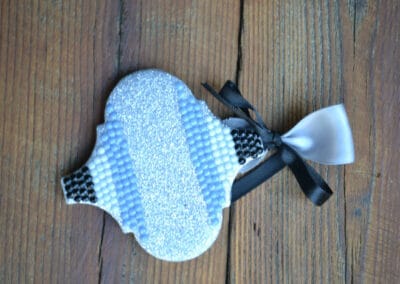
On the glittered tile, I found that I needed an extra step before I diamond painted it. The spray glitter leaves a rough surface on the tile when it’s dry, and I didn’t think the diamonds would stick well. In an effort to smooth out the surface, I covered the glittered tile with a thick layer of Mod Podge and let it dry overnight.
Once the surface was set, then I applied the diamond glue as above. For mine, I covered the whole tile as I intended to cover all of it with the diamonds. However, after I had several stripes of colored diamonds, I decided to stop so that the glitter would show through. I tried placing a few stickers in the middle of the tile, but I didn’t like the way it looked so I took them off and let the glitter shine through. I mean really, can you go wrong with more glitter on an ornament?
After it was dry to the touch, I added a 5-inch ribbon loop to the top, and on the Santa version, a small knot/bow at the top of the ornament. I thought I would like the silver ornament the best, but I really love sparkly Santa suit.
Which of these techniques will you try? I’d love to see yours. Tag me in your posts with #heytrista! You more crafts and recipes to help celebrate special occasions.
 What’s your happy place? Crafting? Cooking? Cocktails? Party planning? Yes please! I love it all, and I’ve tried a lot. Check out my how-to’s! What should we do next?


0 Comments