The problem with sending your child to a Christian School is that they do not endorse one of my favorite holidays of the year: Halloween.
Major bummer.
And as Room Mom, it is particularly frustrating to come up with the replacement holiday themed goodies for “Orange Day.”
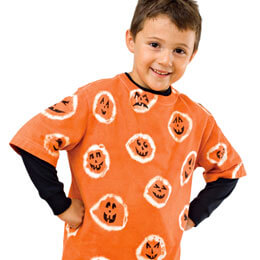
In my desperate attempt to find something suitable and yet astoundingly creative, I discovered this cute idea to make tie-die pumpkin shirts from Family Fun Magazine.
I showed it to Princess for approval and asked her what it was. (This is my age appropriateness test.) “PUMPKINS”
Okay, I’ll take that. If she can tell what it is, then we are a GO.
I grabbed a package of boys white Fruit of the Loom t-shirts from Wal-Mart and washed them. On our previous Octopus outing, I had picked up some Rit dye in sunburst orange. The only other supply I needed was rubber bands. Or so I thought.
I cannot remember when or if I have ever tie-dyed on my own before. In retrospect, I think this may have been one of those activities where I was present for, or perhaps just heard about but never really actually participated in. Kind of like dissecting the frog in 5th grade science class. I let Erin Farley handle that one for me. Not that I have anything against tie-dying. Frog eviscerating, yes. Dying cotton. No. I have owned plenty of tie dyed shirts in my past – but they have all been silk screened as well which leads me to believe that I have never actually had a home-grown version. It’s definitely outside the realm of comfort of what my mother would have volunteered to do with me on a Saturday afternoon. For that I can attest. And I don’t believe I ever saw her in tie-dye – home grown or store bought.
Ah, but what’s precedent for one generation isn’t necessarily for the next. At risk of turning Princess hippie, I jumped in. Princess and I set up shop on the floor in front of the football game with Daddy looking nervously on. At the game, not at us.
The pugs were like the Snoopy vulture, hovering over the pile of rubber bands that Princess was doling out with great scrutiny. Pugs love rubber bands. Word of advice: No matter how often they attempt to weasel their way into this part of the project, hold fast. It’s only trouble waiting to happen. There were several times we had to stop and band wrangle from their little jaws. Princess put Beignet in time out more than once. By the way, pugs don’t really “get” time out, but they are quite nimble when they have snookered a prized rubber band and have a toddler in hot pursuit.
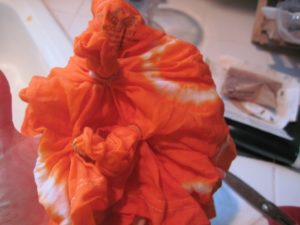
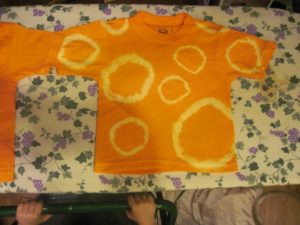
While the band twisting part of the project was too difficult for her little hands to do, she was perfectly happy picking out the rubber bands by color and directing me which to use to bunch up the shirts with. I was making two shirts this go-around. One with a large circle on it, the other with lots of little ones.
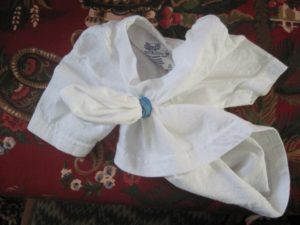
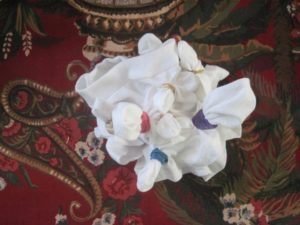
Once that was done – and it was a quick task – it was time to dye. I was hesitant. It seemed so, I don’t know. Permanent? I was afraid I was going to mess it up. Good thing I still had three more shirts in case I screwed it up.
Speaking of permanent. It hit me. I was about to use DYE with a TWO year-old and I hadn’t covered her or myself. Head smack. Off to the craft room. I found some rubber gloves in my craft drawer, thankfully two pairs as Princess insisted on wearing a pair as well. And it turns out they are the perfect accessory to play Patti cake with.
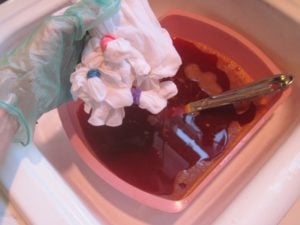
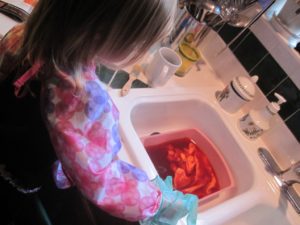
Princess climbed onto her new observation point (mac daddy step stool) and watched intently as I filled the plastic tub in the sink with hot water and dye to make the “dye bath.” Then added the additional water and shirts.
Here’s where trouble starts. You have to stir the shirts for 10 to 30 minutes.
Yes, stir.
What’s a toddler’s FAVORITE thing to help you with in the kitchen? STIRRING.
STIRRING ORANGE DYE. WITH ENTHUSIASM.
I could just picture the whole kitchen, my hair, the walls, the ceiling, the pugs, the wood floors, everything with streaks of sunshine orange.
So I demonstrated the slow stir. She seemed to get it. She also got bored with this version of the controlled slow stir after about 1.5 minutes. She was impressed with the changing of the color of the shirts from white to orange, but not so much that they wouldn’t go back the other way. And then she recommenced her game of Patti cake.
Since Patti cake can be a rather rousing game given the intensity of the participants and that the gloves were not sized to toddler, the gloves went flying into the dye with the shirts, splattering orange all over. Now toddler is crying because her gloves are wet — and orange. And she wants mommy’s gloves. But mommy doesn’t want orange hands so mommy distracts Princess by asking if Princess can pour Daddy some tea in the other room.
Alone at last with the shirts. The dye bath was pretty concentrated so I only dunked the shirts for about 12 minutes.
Once you take the shirts out, then you rinse out the dye with warm to decreasingly cool water. This seemed to take as long as the dying process itself. Geezums. I think I maybe rinsed too long. I’ll tell you this much – it was so long that Princess had now negotiated with Daddy to watch the Wiggles and was dancing like a monkey.
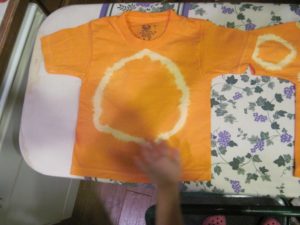
Cut off the bands from the shirt and viola! Perfect circles on the shirts! I am so awesome. I presented it to Princess who said, “OOOOOOOOoooooooo.” I wonder if the concept of this little art exercise is registering at all with her.
Next you have to wash and dry the shirts.
Then I recommend ironing them. After you are done with that, you can draw in your faces.
Here’s where I forgot something. You need some fabric paint. (But you could have gone to the store to get it while your shirts are in the dryer.) If you are a perfectionist, you can use a sharpie or fabric pen first to make your design and then fill in with the fabric paint if you want. I chose to go freestyle.
Put a piece of cardboard or a magazine inside the shirt and sleeves. I just folded some paper towels in the sleeves. If your child uses excessive amounts of paint – as Princess does – she subscribes to the “more is more” theory, then you’ll want this so the paint doesn’t ooze onto the other side of the garment and seal it together.
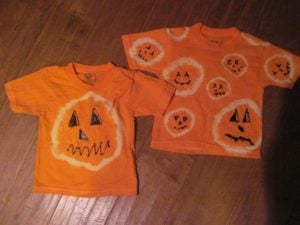
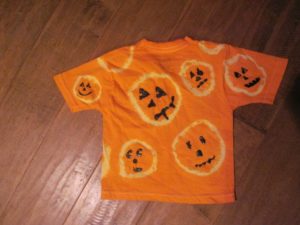
Me and princess teamed up on the pumpkin faces. I drew the eyes and some of the noses. Princess took care of the mouths. I had to help a bit with the squeezing of the tube but she did the pie holes with the exception of I think one where she said she wanted teeth. If you have an older child, I would let them draw all the face in themselves.
You’ll have to do this in a two-stage process. The fabric paint needs about 4 hours to dry. Again, if your child needs a self-help line for paint addiction, you’ll want to bump up your drying time. Let one side dry and then flip the shirt over to do the other side and let it dry. Go figure we had to let ours dry overnight. And if Princess happens to stick a finger in one of the eyes when she’s trying to see the shirt on the table, that’s okay. It adds to the character of the pumpkin face and it washes right off of little hands.
I love the way they turned out. The only thing would do differently if I made these again would be that on the shirt with the one pumpkin, I would do another circle on the back for a second face. I forgot and only did one side. Other than that, I thought they turned out super cute.
What you need to make your DIY Pumpkin Shirts:
- T-shirt
- Rit Dye
- Rubber Bands
- Rubber Gloves
- Water
- Black Fabric Paint
- Washing Machine
- Iron
- Patience. This is not an afternoon project. It is a weekend project.
Special thanks to Family Fun Magazine for the idea for this super cute pumpkin project!
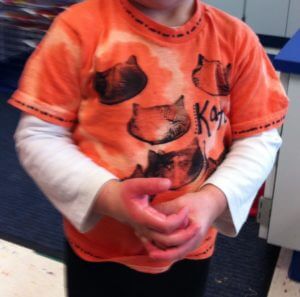
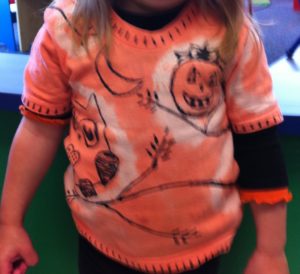
Update – Here are some photos of how some of the other super creative Mom’s in Princess’s class decorated their pumpkin shirts. LOVE THEM!!! I know there were more, sorry I didn’t get photos of all of them. The teachers said they’ll send me some but if you send me yours directly, I’ll post them here.
 What’s your happy place? Crafting? Cooking? Cocktails? Party planning? Yes please! I love it all, and I’ve tried a lot. Check out my how-to’s! What should we do next?


0 Comments