(Audible gasp from 3 ft. tall shadow)
“What? What happened?!” I whipped around to see what she stepped on, dropped, found that the puggies destroyed…
“They’re beee-uu-tiful!”
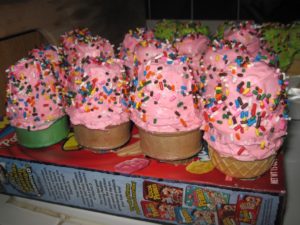
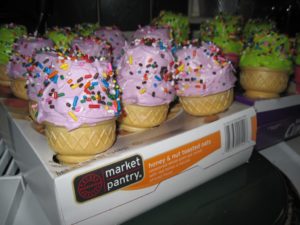
She had scrambled up on her stool to take a closer look at the ice cream cone cupcakes that I had made for her school birthday treat.
Like a broken record, in the next 3 minutes she said that 5 times over, along with one,
“They’re very nice.”
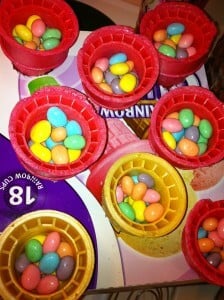
She didn’t know yet that the bottoms were filled with her favorite potty success treat – jelly beans, and that I had made strawberry cake for the cupcakes. (Recipe below.)
She was, however, extremely pleased that these would be the birthday treat that SHE was bringing to school. And that she wanted one with a pink cone.
“Are you driving carefully mommy?” Princess Cupcake asked twice on the way to school that morning.
I’ll admit that despite the carriers I had the hubs make out of a fruity pebbles cereal box, an egg carton, and the ice cream cone box – I was a more than a little concerned about getting them there safely.
But we did – and here’s the proof.
Big win!
Here’s the how-to’s to make your own strawberry cupcake ice cream cones:
Cake!
Paula Deen’s Simply Delicious Strawberry Cake
What you need:
- 1 box white cake mix (18.25 oz size)
- 1 (3oz) box of strawberry flavored instant gelatin
- 1 (15 oz) package frozen strawberries in syrup. Thaw and puree it.
- 4 large eggs
- ½ cup vegetable oil
- ¼ cup water
Preheat oven to 350 degrees. Line your cupcake pans with papers or spray with PAM.
In your big bowl, combine cake mix and gelatin. Add pureed strawberries, eggs, oil and water. Beat this with a mixer at medium speed until smooth. (I used a hand mixer.) Pour into pans and bake the cupcakes for 7 – 12 minutes. Keep checking by stabbing the middle with a toothpick to see if it comes out clean. If you are using pans, bake 9” ones for 20 minutes.
Take out of the oven and put on a cooling rack for 10 minutes – then remove from the pans and cool completely on the wire racks.
Buttercream Icing
(I doubled this – but it makes a truckload. I don’t think you need to do that!)
- 1 cup butter, softened
- 8 cups confectioners’ sugar (I thought this would be too much, but shockingly, it wasn’t. In fact, mine was a little on the runny side, I might have added more. Also, I found that depending on the brand of powedered sugar you use, you may need more than a 2 lb bag. I used two different bags and I guess one was sifted better but there was variation between how many cups were in each.)
- 2 teaspoons vanilla extract
- ½ cup milk
Cream butter. Beat in sugar and vanilla. Add milk until it reaches the consistency you want. Also be careful with your coloring – if you are using drops, remember that they are liquid too. You don’t want your frosting to be too runny.
Ice Cream Cone Cup Cakes
What you need:
- Cupcakes in two sizes
- Jelly beans
- Rainbow sprinkles
- Ice Cream Cones
- Frosting
- Knife
The Fun Part: Decorating
- Fill the ice cream cone half-full with jelly beans
- Take the papers off the cupcakes (if you used them)
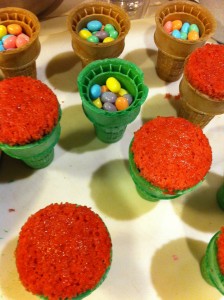
- Put frosting on the bottom of the cupcake
- Tuck/shove the cupcake into the top of the ice cream cone. It’s a tight fit. You can also line the inside of the cone with frosting to give it some extra “glue.”
- Spread frosting on top of the cupcake
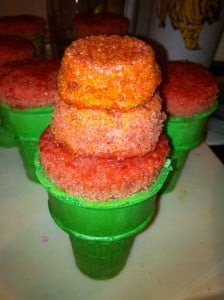
- Turn a mini-cupcake over and “glue” it onto the frosting on top of the big cupcake
- Now I had actually made three sizes of cupcakes so on a few, I insanely put another smaller one on the top using the same technique. However, at 11 o’clock at night it was taking too long to finish each one so I ditched the third cupcake after 10 of them. It was cute, but let’s face it – 3 year olds don’t really need that extra cake and for the love of birthdays, I needed sleep…
- Frost all around the two cupcakes
- If you want to get fancy, you can make it look “soft serve” by using your knife to make swirl marks
- Shake rainbow sprinkles on top
If you are transporting these anywhere – or even if you are moving them around your kitchen, I would recommend making a carrier for them. Take a box, trace around the bottom of your ice cream cone and make circles all over it. Be sure to leave enough distance between each for the fatter part of the upper part of the cone and the frosting. Cut out each of the circles with a knife or scissors. Be sure to close the open ends of the boxes. You might even want to tape them too. You can also take a styrofoam egg carton and cut of the end of the divots. That was a great fix too. Since I was driving them to school, I put the carrier boxes into laundry baskets so they would slide all over the back of the car. It worked out well. I only had one tip over – thanks to my sport suspension – on the VERY bumpy ride to school, or at least it seemed it for the first time because with every jostle I envisioned catastrophe. (Remember the 6 Layers of Sexy Cake?) Luckily this simple fix worked beautifully.




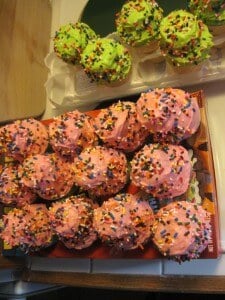

That must have made for some happy, happy, happy kiddos!!
Sugar them up and send them home! They loved it. 🙂